

|
Skin Application Instructions For the iPhone 6 and iPhone 7 - rim skins |
||
 STEP 1: Preparation Find a clean, dust-free table or desk with good lighting and plenty of space to work. Wash your hands to remove any grease or natural oils and dry them thoroughly before application process. |
 STEP 2: Clean iPhone Rim With a soft cotton or microfiber cloth, gently clean your iPhone rim making sure to wipe away any dust or debris. This will prevent any 'bumps' from forming when the rim skin is applied. |
|
 STEP 3: Peel from Liner Starting with the skin furthest to the right (with ringer and volume control cutouts), gently peel it from the liner backing. Avoid touching the adhesive as much as possible when peeling and DO NOT STRETCH SKIN. Stretching will ruin its precise alignment. |
 STEP 4: Align & Place Side Rim Holding the skin at edges, align cutouts with the ringer switch and volume controls. Gently guide the skin in place, lightly laying it onto the top surface of phone (do not fold yet around curvature). Proceed lowering the rest of the strip to surface in a straight line. If you misalign, carefully pull up and readjust. |
|
 STEP 4.1: Align & Place Side Rim This is a side view of how the skin should look at this point. Notice it's only touching the top surface of the phone. This is so that you can easily peel and re-align skin until you have desired placement. |
 STEP 5: Wrap Side Rims Once you have the skin properly aligned, apply pressure over the sides so that they wrap around the curvature. Continue 'massaging' the skin, smoothing out any air bubbles and making sure it's firmly attached to surface. After you're finished, repeat these steps with the second side rim skin piece (containing cutouts for the power button and SIM card). |
|
 STEP 5: Peel Bottom Rim You've already applied the side rims to your phone. Now it's time for the bottom rim skin. Carefully peel it from the liner like you did in step three. |
 STEP 6: Align & Place Bottom Rim Gently guide skin in place using the same technique as in step 4. *Do not wrap around the edges, for now just let it lay on the bottom portion of iPhone (as shown in following image). |
|
 STEP 7: Wrap Bottom Skin Once in place, wrap skin around bottom curvature as you did in step 5 up until the iPhone's rounded edge. The skin ends should careen out past the curve of the iPhone edge as shown in above picture. |
 **STEP 8: Brief Heat We're at the stage where you're going to wrap the skin around the curved edge of the iPhone 6. We recommend you use a hairdryer to help with this step. Although it may sound strange, briefly using a hairdryer to 'soften' the skin helps to avoid any wrinkles or crimps while applying skin around curve. |
|
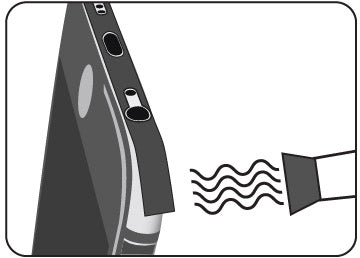 STEP 9: Apply Heat About a half foot away, wave heat from a hairdryer onto the end of the skin you're going to wrap. Depending on the degree of heat and distance, do this for 10 - 30 seconds. When you notice the skin get more pliable and almost feel 'lighter,' you're ready to wrap it. |
 STEP 10: Wrap Around Edge While the skin is 'loosened up,' gently massage it over the edge in baby-steps -- using your index finger to inch the skin forward in the center part while your other fingers pinch it at the sides. If you notice any wrinkles, pull it up a bit and start over. You may need to apply more heat, or put more pressure at the sides of the curve to get it smooth. |
|
 STEP 11: Massage Edge Continue applying pressure to the skin, smoothing out any air bubbles or wrinkles on the edge. You want to make sure the bond between skin and iPhone surface is a secure one. ** It's important to apply pressure for at least one minute. So take your time here massaging the skin on the surface. |
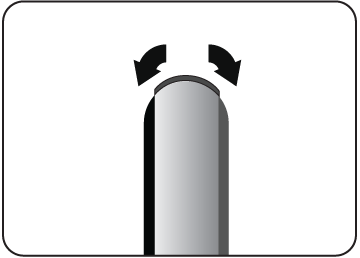
 STEP 12: Apply Top Rim Skin Repeat Steps 5 -11 with the top rim skin. Since there are no cutouts to inform placement, lightly apply the end of the rim first. Wrap it lightly around the top until the other end of the rim lands in the right spot (as shown by the arrows in the pic above). Once in place, peel up both ends around the curve and follow steps 7 - 11. |
|